How to resize an image using OpenCV in Python


Resizing images is a common task in the field of image processing, performed for various purposes such as reducing file size, preparing images for machine learning models, or adjusting images for display on different platforms.
Python, with its rich ecosystem of libraries, offers several tools for image manipulation. One such powerful library is OpenCV (Open Source Computer Vision Library), which provides a wide range of functionalities for image processing tasks. In this blog, I will dive into how to resize images using OpenCV in Python.
1. Installing OpenCV
Before we can start resizing images with OpenCV, we need to ensure that the library is installed in our Python environment. If you haven't installed OpenCV yet, you can do so using pip:
pip install opencv-python
2. Resizing Images with OpenCV
Resizing an image with OpenCV is straightforward. The library provides a method called resize() to perform this task.

Here's a simple example demonstrating how to resize an image using OpenCV:
import cv2

# Load the image
image = cv2.imread('input_image.jpg')

# Define the desired dimensions for the resized image
width = 300
height = 200

# Resize the image
resized_image = cv2.resize(image, (width, height))

# Save the resized image
cv2.imwrite('resized_image.jpg', resized_image)
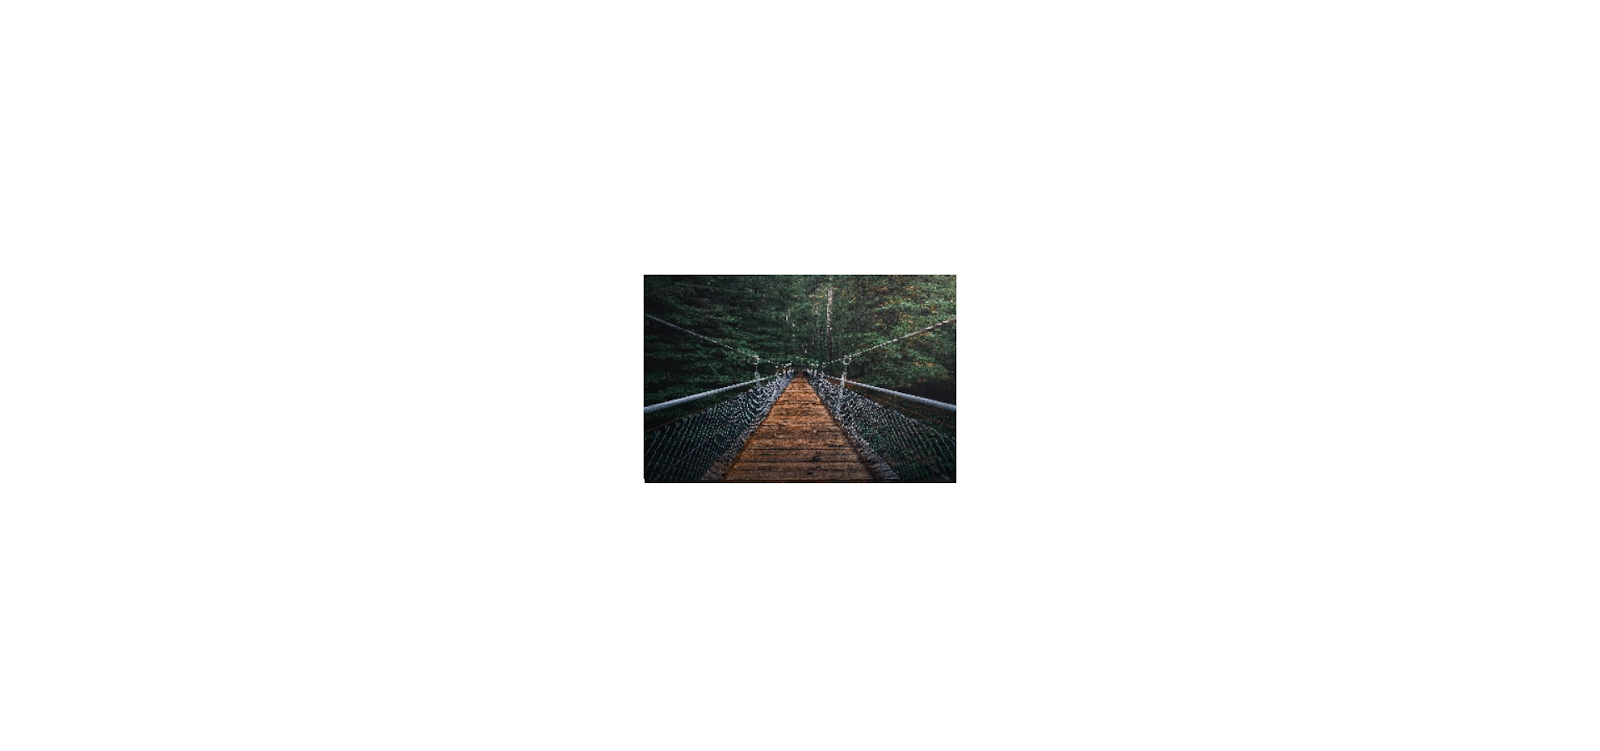
Output
In the above code
We first load the input image using
cv2.imread().Then, we define the desired dimensions (width and height) for the resized image.
Next, we use the
resize()function to resize the image to the specified dimensions.Finally, we save the resized image using
cv2.imwrite().
3. Maintaining Aspect Ratio
When resizing images, it's often essential to maintain the aspect ratio to prevent distortion. OpenCV allows us to achieve this by calculating the aspect ratio of the original image and then resizing it accordingly.
Here's how we can resize an image while preserving its aspect ratio:
import cv2

def resize_with_aspect_ratio(image, width=None, height=None):
    # Get the original image dimensions
    h, w = image.shape[:2]

    # Calculate the aspect ratio
    aspect_ratio = w / h

    if width is None:
        # Calculate height based on the specified width
        new_height = int(height / aspect_ratio)
        resized_image = cv2.resize(image, (height, new_height))
    else:
        # Calculate width based on the specified height
        new_width = int(width * aspect_ratio)
        resized_image = cv2.resize(image, (new_width, width))

    return resized_image

# Load the image
image = cv2.imread('input_image.jpg')

# Resize the image with an aspect ratio
resized_image = resize_with_aspect_ratio(image, width=300)

# Save the resized image
cv2.imwrite('resized_image.jpg', resized_image)
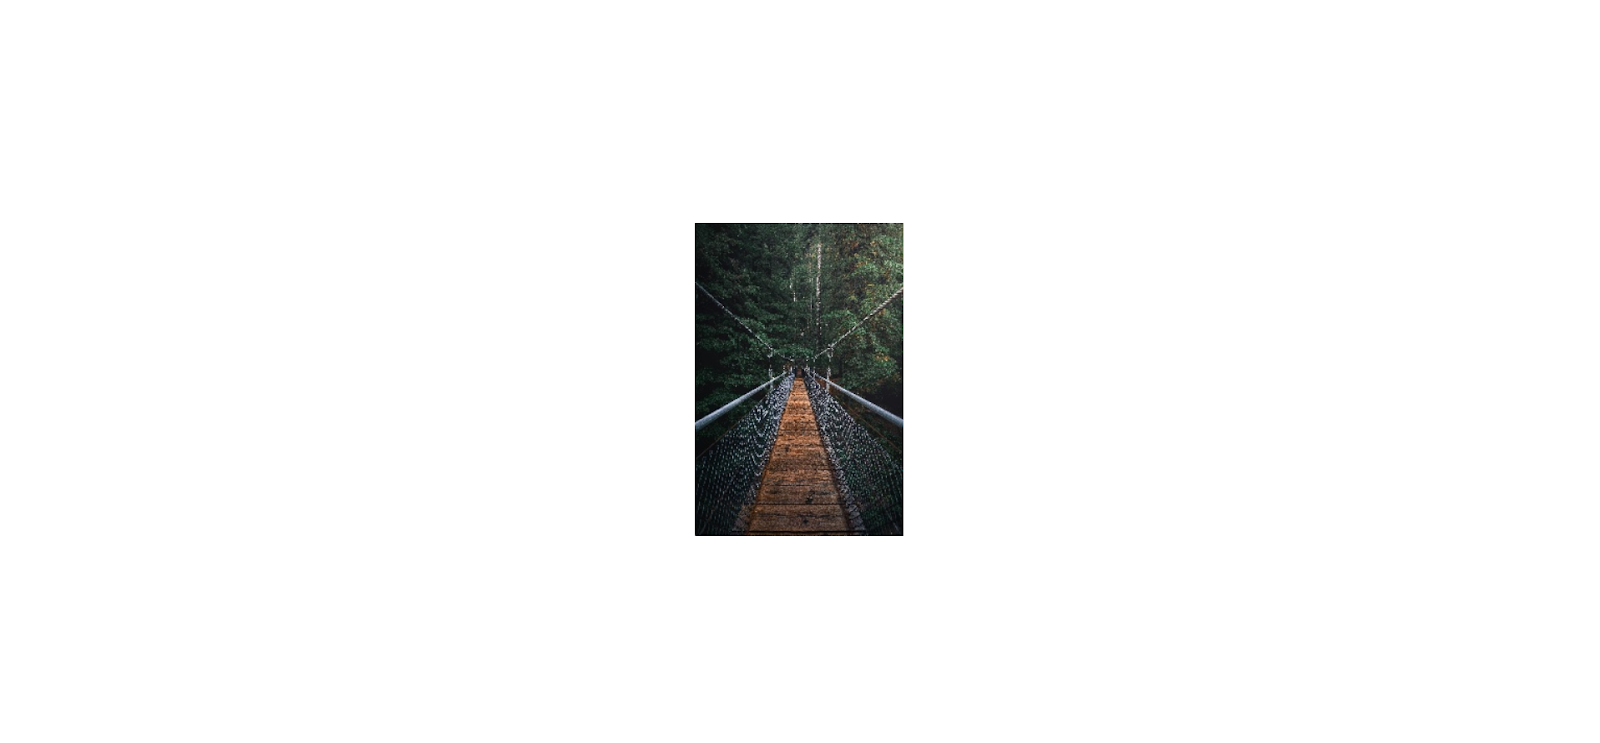
Output
In this code snippet
We define a function
resize_with_aspect_ratio()that takes an image and either width or height (or both) as input parameters.Inside the function, we calculate the aspect ratio of the original image.
Based on whether width or height is specified, we calculate the new dimensions while maintaining the aspect ratio.
Finally, we resize the image using
cv2.resize()and return the resized image.
Conclusion
Resizing images is a fundamental operation in image processing tasks, and OpenCV simplifies this task with its resize() function. In this article, we explored how to resize images using OpenCV in Python, both with and without maintaining the aspect ratio. By leveraging OpenCV's capabilities, developers can efficiently manipulate images for various applications, from computer vision projects to web development tasks.